Instant Pot Chicken and Rice is the perfect one-pot dinner recipe. A delicious comfort food to enjoy all year round! Make either chicken breast and white rice or chicken thighs and brown rice.
Save on time and dishes with this quick and easy recipe made entirely in the electric pressure cooker. Two of my most popular Instant Pot recipes are Instant Pot Rice and Instant Pot Chicken. So I decided to combine the two and make a one-pot meal out of both.
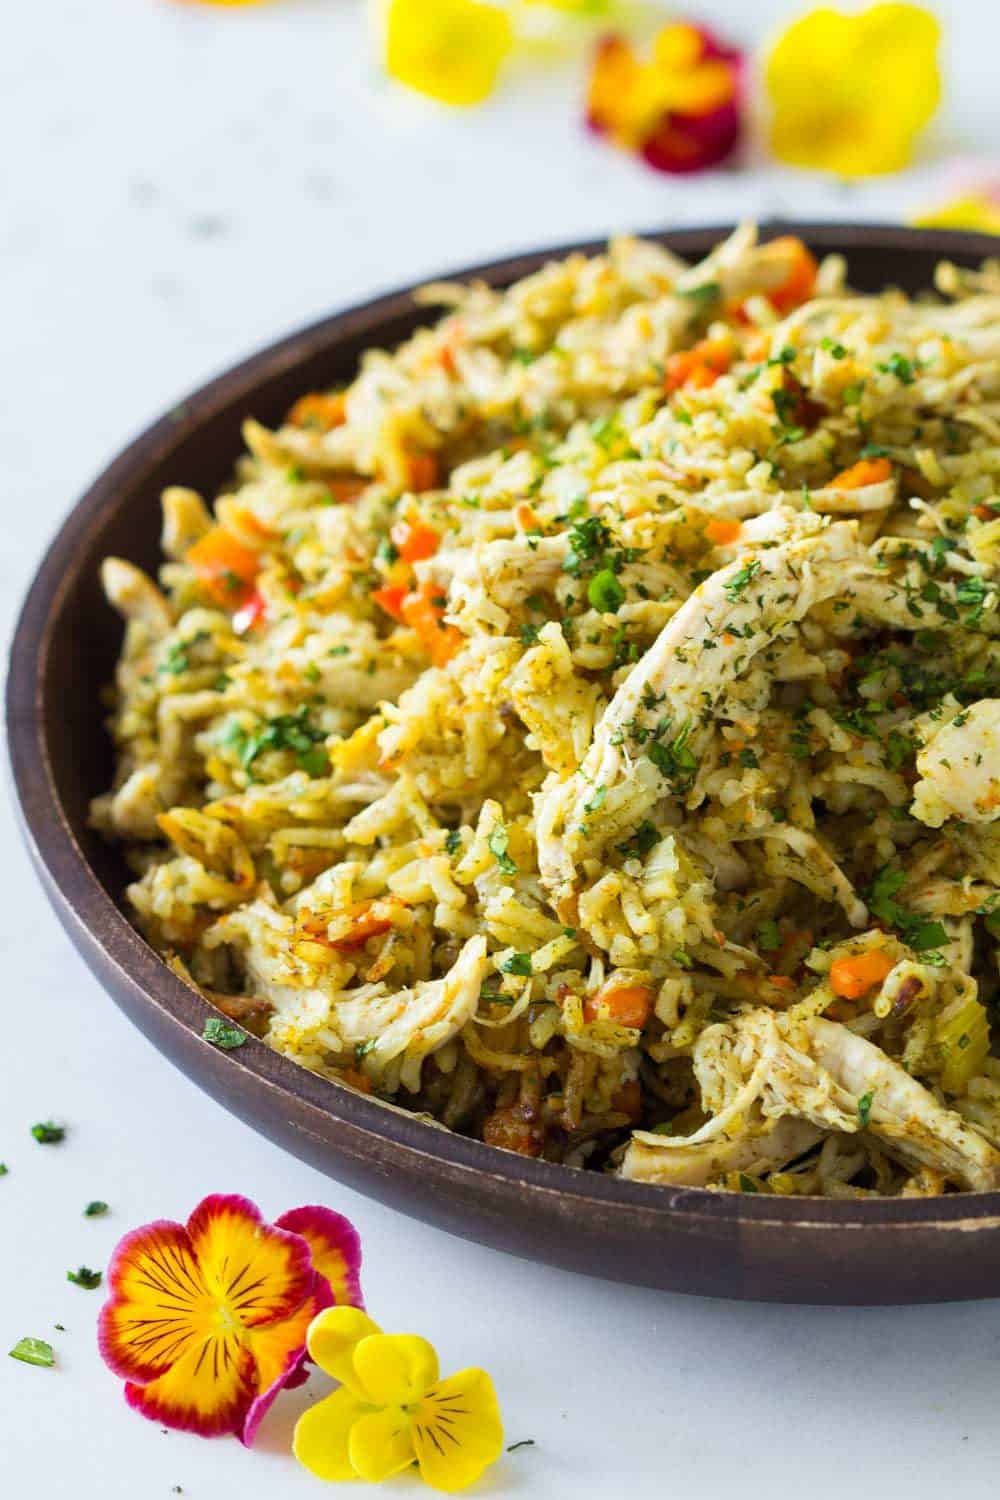
The advantage of a pressure cooker is that water doesn’t evaporate. Grains like rice and chicken can be cooked together perfectly because you use less water for the rice while the chicken sits on top and gets cooked with just the steam. The result is a super-duper tender and juicy chicken and fluffy rice.
If you don’t have an Instant Pot though, you can still enjoy this delicious recipe by making regular 1-Pot Chicken and Rice on the stove.
Instant Pot Chicken Breast and White Rice
The original recipe initially was for chicken breasts and white rice cooked together in the Instant Pot. After extensive testing, I found the right amount of cooking time to achieve fluffy rice and juicy chicken. After 5 minutes high-pressure and 10 minutes natural pressure release, the chicken is JUST cooked. It won’t be dry but it shouldn’t be pink at all, just white.
It’s important to note that if your pin drops before the 10 minutes, the pot most likely didn’t get to high pressure and the chicken might be undercooked. Double-check before you start that the sealing knob is in the sealing position, and no air or steam comes out of the knob.
Instant Pot Chicken Thighs and Rice
Some people asked me for versions of the original recipe but using either brown rice instead of white, or chicken thighs instead of breasts. After what feels like a million test trials, I finally got the formula. Yay!
Brown rice takes triple the time to cook than white rice and would dry out the chicken breasts in the process. The secret is to use bone-in chicken thighs with brown rice. The result was absolutely amazing.
Ingredients and Substitutions
- Chicken – use chicken breasts or chicken thighs. I recommend using chicken breasts no bigger than 6.5oz (180g). If too big, cut them into 1” cubes to ensure they cook through. If using chicken thighs, go for bone-in skinless thighs.
- Cilantro – you’ll need 1 whole bunch of fresh cilantro to make the flavorful cilantro water for the rice. I suggest you don’t replace it, but if needed, you could use parsley. Just keep in mind that it has a slightly stronger flavor.
- Avocado oil – I recommend using a high-smoke point fat, such as avocado oil, ghee or bacon fat. This is important so the fat doesn’t burn at the bottom of the Instant Pot.
- Onion – use one small white or yellow onion.
- Garlic – you will need two cloves.
- Rice – use white basmati or brown basmati rice depending on what piece of chicken you’ll be cooking. I don’t recommend using any other type of rice because they need different cooking times on the Instant Pot.
- Carrots – a staple in many rice recipes. 1.5 or 2 medium carrots should yield a cup when chopped. You can also use baby carrots.
- Celery – when cooked, celery adds great flavor. For this chicken and rice recipe, you will need 2-3 celery stalks.
- Red bell pepper – the more veggies the better. I love red bell pepper for its color and texture. Orange or yellow bell pepper work great too.
How to Make Instant Pot Chicken and Rice
- Season Chicken – add sea salt and pepper generously to both sides of chicken breast or chicken thighs. Set aside.
- Prep Veggies – peel and dice the carrots. Deseed and dice the red bell pepper, and dice the celery. Also, finely chop a medium onion and two cloves of garlic.
- Prep Cilantro Water – add a bunch of cilantro and 1 cup of room-temperature water into a blender. Blend until completely smooth and no bits of cilantro are left.
- Preheat Instant Pot – press the “Sauté” button on the panel to preheat the pot.
- Sauté Onion and Garlic – once the Instant Pot display says “hot”, add a drizzle of oil or fat and then add the chopped onion and garlic. Sauté until translucent.
- Add Remaining Ingredients – this is a very important step and you need to work fast! Once the onion and garlic are ready, add the rice, season with salt and pepper, then add the cilantro water. Give a quick stir, then add the diced vegetables on top of the rice (make sure not to mix them in). Then, place the chicken on top of the veggies and close the lid immediately. The reason for this is to avoid too much water from evaporating so you don’t get the nasty “burn warning” on your Instant Pot. (See my tips to avoid the burn warning below).
- Set the Instant Pot – Seal the pot lid and turn the pressure valve to the “sealing” position. then press the “Cancel” button. Now press the “Manual” button and select 6 minutes high pressure if you’re cooking chicken breast with white rice. Or select 22 minutes high pressure if you’re cooking chicken thighs with brown rice instead.
- Release Pressure – once the Instant Pot beeps, wait for full natural pressure release. This can take anywhere from 15-25 minutes until the safety pin drops on its own.
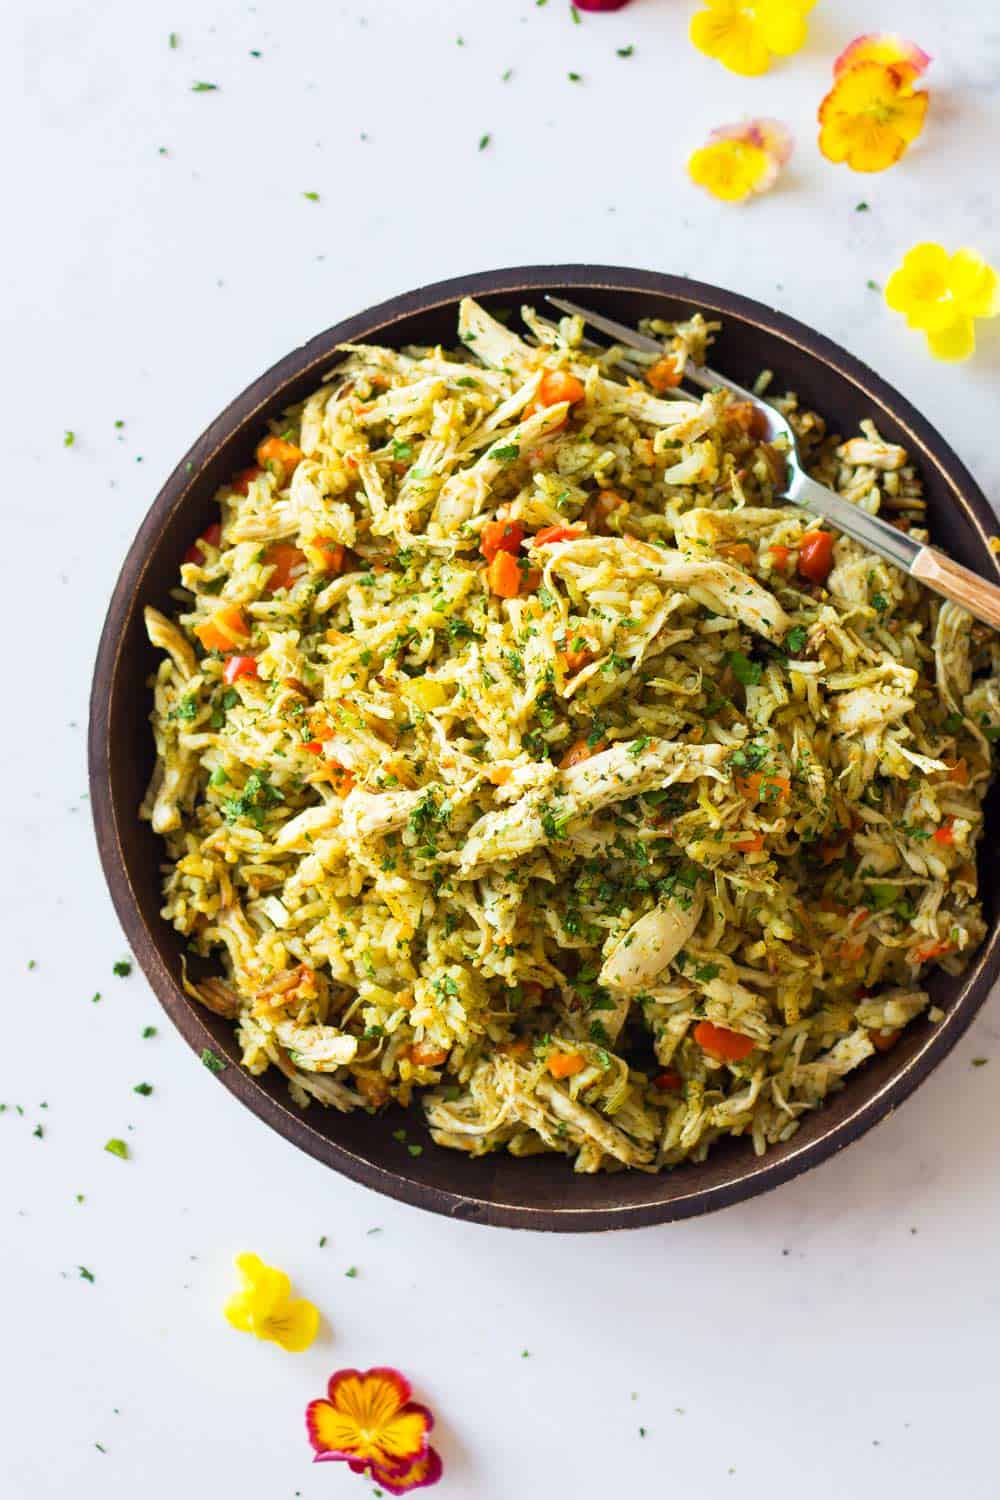
- Shred Chicken and Serve – when the Instant Pot chicken and rice is finished cooking, open the lid and shred the chicken using two forks. Then mix everything together and serve immediately. Sprinkle some chopped cilantro on top and dive in!
Tips To Avoid The Burn Warning
Sometimes Instant Pots can be finicky and give you the Burn Warning even when you think you made everything right. After some trial and error, I found some tips that will help you avoid the burn warning:
- Don’t skimp on the fat for sautéing the onion and garlic. Be generous.
- After sautéing the onion and garlic, make sure there are no burnt bits and pieces stuck to the bottom of the pot. If necessary add a splash of water and deglaze the bottom with a wooden spoon to scrape everything off.
- Have ingredients already measured out and ready to go so no time is wasted. This is especially important for the diced vegetables. Have them chopped and all in one bowl ready to add.
- Once you add the rice, add the cilantro water immediately and stir. Do not let the dry rice sit on the hot bottom of the pot without liquid for more than 5 seconds.
- Do not mix the vegetables and chicken in the cilantro water. Let them sit on top of the rice.
- Put the lid on quickly. The longer it takes to close the pot, the more liquid evaporates. This increases the chance to get the burn warning.
Frequently Asked Questions
Absolutely! As long as you choose the right cooking time to ensure either are well cooked through it is perfectly safe to cook both at the same time.
Yes! As long as you make sure chicken reaches 165F internal temperature it is 100% safe to add to the Instant Pot.
If you add dry or rinsed rice to an already preheated or hot Instant Pot and don’t add liquid to it at the same time or very quickly after your rice will immediately stick to the bottom and start burning.
Instant Pot Chicken and Rice
Equipment
- instant pot
Ingredients
- 2 5oz / 10 oz chicken breasts / bone-in skinless chicken thighs - (Either 2 five-ounce chicken breasts if you are making the recipe with white rice. OR. 2 ten-ounce bone-in chicken thighs if you are making the recipe with brown rice.)
- 1 bunch cilantro
- 1 cup water - (at room temperature, not cold!)
- 1/2 Tbsp ghee or bacon fat or avocado oil
- 1 small diced onion
- 2 cloves garlic
- 1 cup white basmati rice or brown basmati rice - (choose white or brown depending on the type of chicken you are using)
- 1 cup diced carrot
- 1 cup diced celery
- 1 cup diced red bell pepper
- Salt
- Pepper
- cilantro for garnishing
Instructions
- Generously season chicken with salt and pepper on both sides and set aside.
- Peel and dice carrot, dice celery, deseed and dice bell pepper.
- Add cilantro and room-temperature water into a blender and blend until completely smooth.
- Peel and chop onion and garlic.
- Preheat Instant Pot by pressing the “sauté” button.
- Once the Instant Pot's display says "hot": add fat or oil, chopped onion, and garlic, and sauté until translucent. Stir often. Make sure no burnt bits of onion or garlic are stuck to the bottom of the pot. If for some reason there are, deglaze by adding a tablespoon or two of water and scrape with a wooden to remove all bits from the bottom.
- Now work fast: add rice, salt and pepper to Instant Pot and then pour in cilantro water and give it a quick stir. Add diced vegetables on top in one layer (do not mix in!) and then top with seasoned chicken breasts. Then IMMEDIATELY close lid to avoid water from evaporating (<-important!)
- Turn venting knob to "sealing", hit "cancel" and then "manual" and adjust to 6 minutes high pressure for chicken breast / white rice version OR 22 minutes for chicken thigh / brown rice version.
- Wait for full natural pressure release. This means once the pot beeps don't do anything. Don't touch the valve and instead just wait for the safety pin to drop on its own. This can take anywhere from 15-25 minutes.
- Open the pot and enjoy the smell! Then use two forks to shred the chicken. Mix it all and serve immediately with some fresh cilantro sprinkled on top.
Notes
- *Please read the blog post section where I go into detail about what to pay attention to in order to succeed to avoid any error messages from the pot.
- nutritional info is for white rice and chicken breast.
Nutrition
 Happy New Year + e-book launch!!
 Easy Grated Carrot Salad
 21 Best Thanksgiving Salad Recipes
Bethanne says
Excellent! My whole family loved it. I used two cups of water/bone broth combo. I have the biggest instant pot and wonder if the people who’s meal burned did so because you have to have at least 2 cups of liquid. Mine turned out great. Will definitely make again. Thank you so much for the yummy recipe.
Lorena says
I think it’s many different reasons and at some point I had a 2 pages long note section in the recipe to address each and every one of the reasons it could be but it ended up looking absolutely ridiculous. Especially considering most people ARE successful with the recipe. Maybe I should rather do a video going into all the “burn” details. That would save us all a ton of time :)
John says
Hi! I made this recipe tonight (thighs and brown rice), It came out perfect and tasted wonderful! It’ll become one of our regulars. I did tweak the recipe a little; I blended chicken broth with the cilantro instead of plain water for a little richer taste, everything else was to the letter! Glad I found your channel, can’t wait to try some of your other recipes!
Jill Bradley says
I”m going to try the chicken thigh and brown rice one and then will back (if I can remember) to comment! Thanks so much for this!
If you do any dishes I would love some without meat for me (or an option to cook for Hubs using meat, same dish without meat) I eat meat but want to eat less of it as thinking about what I’m eating makes me ill in my stomach :-P haha…..but really it does. Thanks, Love Jill
Lorena says
Hey Jill, if you click on “Recipes” in the menu you can then choose “vegetarian” or “vegan” and it lists all my vegetarian/vegan recipes on the blog :)
Carole Westby says
2 5 oz breasts, OR 2 10 oz thighs. This makes no sense. I’ve never seen 5 oz breasts or 10 oz thighs- wigged out with all the burn stuff and then some girl says she did 3 # of thighs so ARGH!!!!! how many oz. of either is one supposed to use????????????
Lorena says
Carole, I’m not sure I understand your question. This recipe gives two options. Either you make it with white rice and for that you use 2 small chicken breasts about 5oz (140g) each. Organic chicken breasts are small so the chicken breasts I buy are always small. If you prefer conventional they might be bigger but you can simply cut them in half lengthwise and end up with same size/thickness breasts.
If instead you want to make the other version with brown rice, you choose 2 bone-in chicken thighs. The bones of the thighs are fairly heavy which is why the thighs are heavier than the breasts. Try to find thighs that weigh approximately 10 oz each. It doesn’ have to be exact it’s just so they cook in the same time mine did.
What I don’t understand about your question is this part: “wigged out with all the burn stuff and then some girl says she did 3 # of thighs so ARGH!”
I’m not sure what you mean with wigged out burn stuff and I also don’t know which girl you are talking about. This blog is written by me and the girl in the video is me and writing this comment is me. Do you mean me or do you mean another commenter below? I recommend 2 thighs, not 3 at any point in the post or the video.
Vicki Davidson says
LORENA SORRY CAPS LOCKED BUT HOPE THIS HELPS. OMG I LOVEEEE YOUR RECIPES. BUT MAY EXPLAIN THE BURN WARNING. IT WORKED FOR ME WHEN I RINSED AND PUT IN WET
https://instantpot.com/how-to-cook-perfect-rice-in-an-electric-pressure-cooker/
Lorena says
Hi Vicky, thank you for your lovely comment (sorry, had to delete the instructions you copied, they are copyrighted) but I left the link in so everybody can go have a look :)
I personally, never rinse my rice and explain why in my own post about How to Cook Instant Pot Rice.
I’m convinced it’s a pot issue. Some heat to fast too high. If putting in wet rice fixed the problem for you that is totally awesome and thank you so much for sharing. I will most definitely recommend that as a fix.
Linda says
Great recipe. First time to try anything from your site. Will visit your recipes again soon. Thanks!
Troy says
Great recipe,it just the wording wrong in the recipe directions is why a few people are burning the rice. After sauting the liquid needs to be addd before the rice. The innatal heat from sauting is what burns the rice. Add your liquid first then the rice. All should be good
Lorena says
That’s a good tip. I don’t add the liquid first (as seen in the video) I do work fast though so liquid is poured over rice within a couple seconds. I’ve never had the burn message ever on absolutely any recipe and I have many theories of why this is happening to people but I can’t be sure. The only way to find out for each individual case would be to watch them cook and that’s impossible :(
Brandi says
I would love to try this recipe. Have you tried boneless/skinless chicken thighs and white rice? What would the cooking time be? Would I need to make any other adjustments with using this variation?
Lorena says
Hi Brandi, yes you can do that, you would have to cube the chicken meat and lay out in one layer over the rice. The timing for the white rice version will work for this combo.
Erin says
I used white basmati rice and chicken thighs with the bone in, just because that’s what I had. Just sliced the thighs deeply here and there, cooked for 7 minutes. Turned out perfectly. I realise your comment is from last year but maybe someone else will find it helpful. Top recipe. Thanks!
Lorena says
Thank you so much for the feedback and yes, the post is a year old but it’s an all-year popular recipe and feedback is always great :)
Shara says
Hi Lorena, can i saute with regular olive oil? don’t have ghee or bacon fat. thanks. and if i leave the skins on (just for less handling) is it super greasy – is that why you recommend removing?
Lorena says
Hey Shara, you can use olive oil but in my opinion it’s not a good oil to sautée because it burns and becomes extremely bitter. The reason I use ghee, bacon fat or avocado oil is because they all have a very high smoke point and don’t burn. Maybe set the sauteé function on medium high instead of high, just in case.
Kathie Mau says
Can I use Uncle Ben’s Converted Rice instead of your white rice?
Lorena says
I’m not familiar with that brand and kind, so I’m not sure but if it’s a white rice that on the stove usually cooks in 15-20 minutes it should in theory work.
Kelly says
What would I do differently if I used chicken breast and brown rice?
I have never used my instapot and thinking this will be my first recipe!
Lorena says
Hey Kelly, the timings are all because of the rice. Brown rice takes 22 minutes, otherwise it’s not cooked through. If you cook chicken breast for 22 minutes it becomes MEGA dry. I don’t recommend mixing the two.
Amber says
This recipe was quick, pretty easy, and delicious. I could eat it every week. I used chicken breasts and white rice, and I left the celery out because I didn’t have any on hand. I did pre rinse the basmati rice. My Indian mother in law always does 😊 Thank you for a yummy, healthy recipe.
Shannon says
I tried this recipe & followed it to the T. Burn warning came on. Sure enough open the pot and the rice on the bottom was burning 😢
Lorena says
Shannon, I’m crying with you! I have about 80% of people saying the recipe works like a charm and 20% of people saying they get the burn message and I am at a complete loss to know how I can help. I’ve never been able to recreate that. My IP has never given me a burn message ever for any recipe. I’m so sorry the recipe didn’t work out for you :'(
Aysegul Sanford says
Made the chicken thigh & brown rice combo this evening and followed the recipe to a tee and it worked out perfectly. I wouldn’t change anything.
Between my husband and I, we finished a 4 serving dish at one sitting. :)
Delores Harmon says
Follow directions to the letter, just added frozen peas at the end, may try broccoli florets next time…excellent results and no dreaded burn notice. I did the chicken breast with basmati rice, this was a hit!!! I’m recommending that folks don’t deviate from your directions and they’ll have success! Shared photos and recipe on Instant Pot FB page!!! Thanks👍👍👍
Lorena says
Thank you so much Delores!! You are the best!
Cassie says
This looks so yummy!
I am new to the instant pot so I followed your recipe and notes exactly. I got a burn error after a couple minutes because the rice was sticking to the bottom. What am I doing wrong?
Thank you!!
Cindy says
Did you switch the sauté setting to off then to manual?
Lorena says
Yes Cindy. You press on cancel and then manual.